
MjjM Salons Blog
How to Do a Flawless Curtain Bangs Trim at Home
By the MjjM Salons team
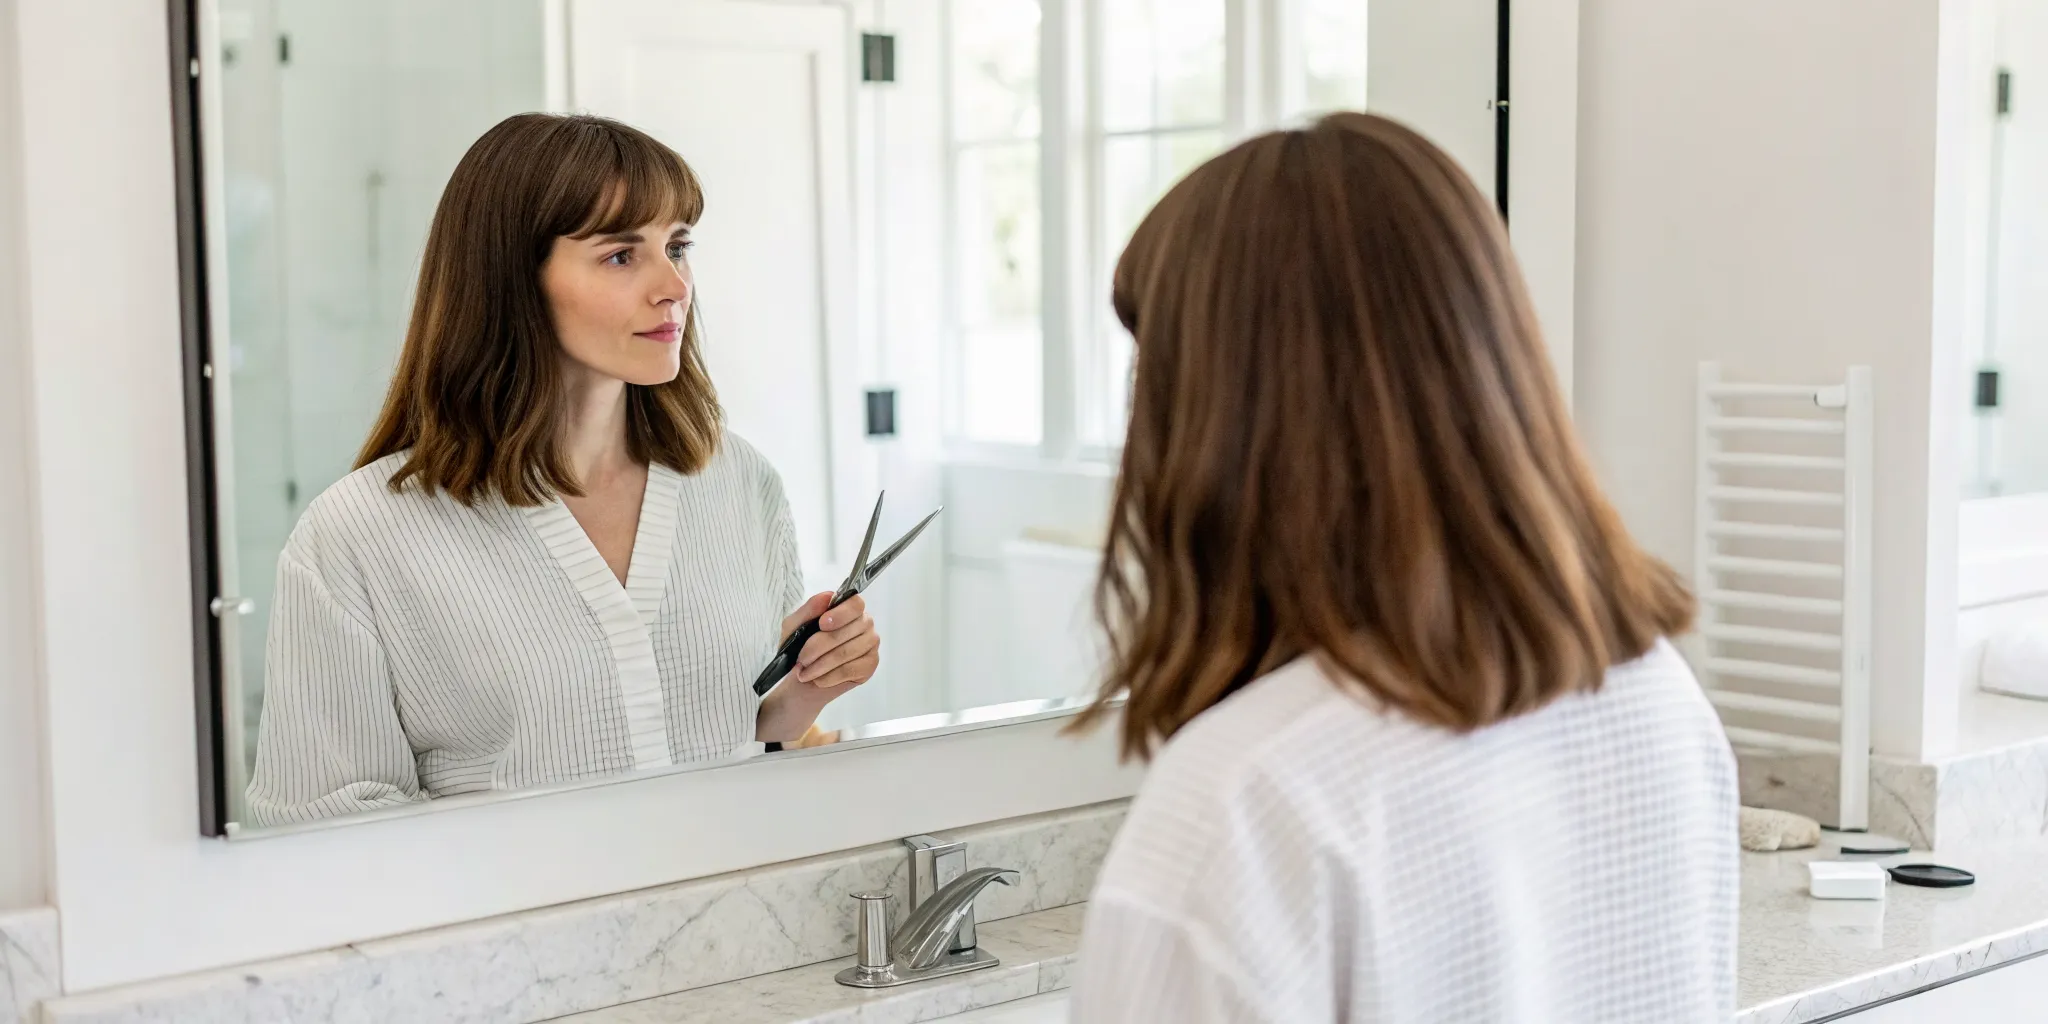
The best thing about curtain bangs is their effortless, lived-in style. The worst thing? How quickly they can grow from perfectly framing your cheekbones to poking you in the eye. Before you resort to awkwardly pinning them back for weeks, consider this your official permission to give them a little refresh. Mastering a quick at-home curtain bangs trim is the secret to extending the life of your favorite haircut. We’ll show you how to do it safely, so you can maintain that perfect length and shape, keeping your style looking intentional and polished until your next appointment with a professional.
Key Takeaways
- Start with the Right Setup: Always trim your bangs when they are completely dry and styled as you normally wear them. Using sharp, hair-cutting shears, not kitchen scissors, is crucial for getting a clean cut and preventing split ends.
- Cut Less and Cut Softly: Trim your bangs a little longer than you think you want them, since you can always take more off later. Instead of cutting straight across, snip vertically into the ends to create a softer, more blended look.
- Leave the Big Jobs to a Stylist: At-home trims are perfect for maintenance, but the initial cut or a major fix should be done by a professional. If you make a mistake, stop cutting and book an appointment to have it blended correctly.
So, What Are Curtain Bangs?
If you’ve been scrolling through hair inspiration lately, you’ve definitely seen curtain bangs. This soft, face-framing style parts in the middle and sweeps to the sides, much like a pair of open curtains. It’s a nod to the effortless cool of the '70s, but with a fresh, modern feel that has made it one of the most requested haircuts around. They offer a way to change up your look without the full commitment of traditional, blunt bangs. The beauty of curtain bangs is their versatility; they can be cut to blend seamlessly with your hair or styled to make more of a statement.
What Makes Them Different From Other Bangs?
Unlike classic bangs that are cut straight across the forehead, curtain bangs are all about softness and movement. They are typically shorter in the center and gradually get longer as they move toward your temples, creating a graceful, tapered effect. This structure helps them blend into the rest of your hair, avoiding that harsh, solid line you sometimes get with other bang styles. Because of their feathered shape, they are much easier to grow out. You won't have that awkward in-between phase, making them a perfect entry point if you're curious about trying this trendy haircut but feel a little nervous about the upkeep.
Why They're Flattering on Almost Everyone
One of the best things about curtain bangs is that they genuinely look great on just about everyone. Their versatility allows a stylist to tailor the cut to complement your specific face shape and hair type. For heart-shaped or square faces, they can soften angles and draw attention to the eyes. On round or oval faces, they add dimension and can create the illusion of more defined cheekbones. Whether your hair is fine, thick, straight, or wavy, the feathered layers can be adjusted to work with your natural texture, not against it. The key is getting a cut that’s personalized for you, so it’s always a good idea to find a professional stylist who can help you achieve the perfect look.
Gather Your At-Home Trimming Kit
Before you make the first snip, getting your tools in order is the most important step. Think of it like cooking a new recipe; you wouldn't start without having all your ingredients measured and ready. The right kit not only makes the process smoother but also helps you avoid those "oops" moments we all dread. Having everything you need within arm's reach will give you the confidence to trim your curtain bangs like you know what you're doing.
Hair-Cutting Shears
Please, step away from the kitchen scissors. Using scissors meant for paper or packaging on your hair is the fastest way to get frayed, uneven ends. Investing in a pair of proper hair-cutting shears is non-negotiable. These are specifically designed to be incredibly sharp, which allows them to make a clean, precise cut. This not only gives you a much more professional-looking result but also helps prevent split ends. You don't need to buy the most expensive pair on the market, but a dedicated set of hair shears will make all the difference in your at-home trims.
A Fine-Tooth Comb
Next up is a simple but mighty tool: a fine-tooth comb. This is your secret weapon for precision. Before you even think about cutting, you’ll use this comb to create clean partings and section off your bangs perfectly. It also helps you smooth the hair down, removing any bumps or tangles so you can see exactly what you’re working with. When you comb the hair flat, you get a clear guide for where to cut, which is essential for achieving that soft, symmetrical curtain bang shape. Don't skip this step; it takes just a second and ensures your sections are neat and tidy.
Sectioning Clips
To avoid any accidental snips of hair that aren't your bangs, you'll need a few sectioning clips. These are a stylist's best friend for a reason. Once you’ve used your comb to create that classic triangle section for your bangs, these clips will hold back the rest of your hair securely. This keeps your workspace clean and ensures you’re only focused on the hair you intend to cut. It’s a simple trick that prevents a lot of common mistakes. Any type of salon clip or even a few sturdy bobby pins will do the job, as long as they keep stray hairs out of your face.
A Good Mirror Setup
Where you do your trim matters just as much as how you do it. Find a spot with a large mirror and great lighting, like your bathroom vanity. You need to be able to see your face straight-on without tilting your head, as an awkward angle can easily lead to a lopsided cut. Propping up a small handheld mirror just won't give you the full picture you need for a symmetrical result. Make sure you can see everything clearly and comfortably before you begin. A proper setup is your final checkpoint for a successful trim, ensuring you can accurately judge the length and balance of your bangs as you go.
Your Step-by-Step Guide to Trimming Curtain Bangs
Alright, you’ve got your tools, you’ve found your courage—let’s do this. Trimming your own curtain bangs can feel a little nerve-wracking, but with a steady hand and a clear plan, you can absolutely nail this touch-up. The key is to go slow, be patient, and follow these steps exactly. Remember, you can always take more hair off, but you can’t put it back on. Let’s walk through it together. You’ve got this!
Step 1: Start With Clean, Dry Hair
First things first, wash and dry your hair completely. It’s best to style it just as you normally would, whether that’s with a blow dryer or letting it air dry. Cutting bangs wet is a common mistake that often leads to them being way too short once they dry and shrink up. Working with dry, styled hair ensures you see exactly how your bangs will fall, so you’re trimming them for your real, everyday look. This gives you total control and prevents any unwelcome surprises when you're finished.
Step 2: Create Your Triangle Section
Now, let’s isolate your bangs. Part your hair down the middle. To find the corners of your bang section, look in the mirror and find the arches of your eyebrows; the section should start directly above them. The point of the triangle will be about an inch or two back from your hairline. Use your comb to create clean parts, forming a triangle of hair at the front of your head. This technique is a salon standard that our expert stylists use every day to create perfectly shaped bangs for clients.
Step 3: Find Your Part and Isolate the Center
With your triangle section defined, part it down the middle. This creates the "curtain" effect. For now, let one side hang loose while you focus on the other. Take a small, thin piece from the very front, right along your part. This small section will be your guide for the shortest part of your bangs. Starting with a tiny piece is much less intimidating than trying to cut the whole section at once. It allows you to establish your length carefully before committing to the full trim.
Step 4: Clip Back the Rest of Your Hair
This step is non-negotiable for a clean cut. Use your sectioning clips to securely pin back all the hair that is not part of the small center piece you just isolated. This includes the rest of your triangle section and all the hair on the sides and back of your head. Creating a clear workspace prevents any accidental snips into hair you didn't mean to cut. It lets you focus entirely on the task at hand without any distractions, which is crucial when you have sharp scissors near your face.
Step 5: Make Your First Cut (Longer Than You Think!)
Take that small center section between your index and middle fingers. Pull it straight down, and decide on your length. A good starting point for curtain bangs is usually around your cheekbones or the tip of your nose. Now, here’s the most important rule: cut about a half-inch longer than you actually want the final length to be. This gives you a safety net for refining the shape later. You can always go back and trim a little more, so starting conservatively is the smartest approach.
Step 6: Point Cut for Softer Edges
Instead of cutting straight across in a blunt line, you’ll want to use a technique called point cutting. Hold your shears vertically and make tiny snips directly into the ends of the hair. This creates a softer, more feathered edge that looks professionally blended and less severe. It helps the bangs lay beautifully and gives them that signature wispy, effortless look. This is what prevents that "I just cut my own bangs" look and gives you a more polished, salon-quality finish.
Step 7: Blend the Bangs with Your Hair
Now it’s time to connect your bangs to the rest of your hair. Unclip one side of your triangle section. Comb this new hair together with the piece you just cut. Pull the combined section diagonally across your face, pointing away from the side it belongs on. Following that diagonal line, point cut downwards to create a seamless, sweeping angle that blends the shorter front pieces into your longer side layers. Repeat this exact process on the other side for a symmetrical flow.
Step 8: Check for Symmetry
For the final check, unclip everything and let your bangs fall naturally. Bring both sides of your bangs together at the center of your face to see if they are even. Look closely in the mirror. Do they hang at the same length? Is the angle of the sweep similar on both sides? If one side is slightly longer, make tiny, careful snips using the point cutting technique to even it out. And that's it—you did it
Common Mistakes to Avoid When Trimming
Giving yourself a quick trim can feel empowering, but a few common slip-ups can turn a simple touch-up into a hair emergency. I’ve seen it all, and trust me, avoiding these mistakes is just as important as following the right steps. Let’s walk through what not to do, so you can keep your curtain bangs looking fabulous between salon visits.
Using Kitchen Scissors
I know it’s tempting to grab whatever scissors are in your kitchen drawer, but please resist the urge. Your everyday craft or kitchen scissors are not designed for hair. They are often too dull, which can bend and chew the hair shaft instead of making a clean cut. This leads to split ends and a choppy, uneven finish. To get that soft, professional look, you need to use proper hair-cutting shears. You can find an affordable pair online or at a beauty supply store; they are a small investment that makes a huge difference in the health of your hair.
Cutting Your Bangs Wet
This is a classic mistake and one of the easiest to make. Hair stretches when it’s wet and shrinks up as it dries. If you cut your bangs while they’re damp, you risk them springing up much shorter than you intended once they’re dry. This effect is even more dramatic if you have wavy or curly hair. For the most accurate results, always trim your bangs when your hair is completely dry and styled how you normally wear it. This way, you can see exactly how the length will fall and avoid any surprise micro-bangs later.
Making a Blunt, Straight Cut
Curtain bangs get their signature dreamy, face-framing look from soft, feathered ends, not a hard, straight line. Cutting your bangs bluntly straight across will look severe and unnatural. Instead, you’ll want to use a technique called point cutting. After you’ve made your initial guide cut, hold the shears vertically and make tiny snips into the ends of your hair. This simple point cutting technique breaks up the solid line, creating texture and a much softer, more forgiving edge that blends beautifully.
Forgetting to Blend
A successful curtain bang trim is all about that seamless transition into the rest of your hair. If you only focus on the front section, you can end up with two distinct blocks of hair that don’t connect. To create that sweeping "curtain" effect, you need to blend the sides. After you’ve trimmed the center, take the side sections of your bangs and comb them forward. Angle your shears downward, following the line of your face, and continue to point cut. This will connect the shorter front pieces to your longer face-framing layers for a cohesive, polished style.
Trimming Too Much at Once
When it comes to trimming your own bangs, the golden rule is: less is more. It’s incredibly easy to get a little scissor-happy and take off too much length at once. Remember, you can always go back and cut more, but you can’t glue it back on. Start by trimming just a tiny amount, less than you think you need. Step back, check the length, and then decide if you need to trim more. If you do make a mistake and go too short, put the scissors down. Trying to "fix" it often makes it worse. Instead, embrace some cute styling tricks with bobby pins and give them time to grow.
How to Style Your New Curtain Bangs
Okay, you’ve successfully trimmed your bangs without a major incident, congratulations! Now comes the fun part: styling them. The right technique is what gives curtain bangs their signature breezy, face-framing look. A few simple steps can take your bangs from just okay to absolutely perfect. Don’t worry, you don’t need to be a professional to master the swoopy, effortless vibe. With the right tools and a little practice, you’ll be styling your new bangs like you’ve had them for years. It’s all about creating volume, adding a bit of texture, and making sure they fall exactly where you want them.
Use a Round Brush for Volume and Shape
The key to getting that classic curtain bang sweep is a round brush and your blow dryer. For a flawless look, start with damp bangs. Using a medium-sized round brush, blow-dry your bangs forward and down, away from your part. This helps neutralize any cowlicks or natural splits. Once they’re mostly dry, roll them up in the brush, lift, and hit them with heat for a few seconds, followed by a cool shot to set the shape. For extra staying power and volume, you can roll the warm section up in a large velcro roller for about 10 minutes, just as this definitive guide to curtain bangs suggests. This simple trick sets the curve and gives you that perfect, all-day bounce.
Apply Lightweight Products for Texture
When it comes to bangs, less is more with products. Heavy creams or serums can weigh them down and make them look greasy in no time. Your best friend for daily styling will be a lightweight texturizing spray or, even better, dry shampoo. Even on clean hair, a quick spritz of dry shampoo at the roots can absorb any excess oil throughout the day and add a touch of grit and volume. This keeps your bangs looking fresh and piecey, not flat or stringy. If you need a bit of hold, finish with a light-hold hairspray, misting it from a distance to avoid making your bangs stiff.
Tame Cowlicks and Unruly Hair
Cowlicks and stubborn hair patterns can be the biggest challenge when styling bangs, but you can definitely win the battle. If you have a persistent cowlick that forces your bangs to separate, try this trick: while your hair is damp, use a flat clip to secure your bangs at the root, forcing them to lay in the direction you want as they dry. For extra control, a small flat iron or even a beard iron can be a game-changer. The smaller plates allow you to get right to the root and apply targeted heat to smooth out any unruly sections. If your hair is still putting up a fight, the stylists at our Supercuts locations are experts at offering personalized advice for tricky hair types.
Keeping Your Bangs Fresh Between Salon Visits
Even with the perfect at-home trim, your curtain bangs will need a little daily attention to look their best. Since they frame your face, they tend to get oily or unruly faster than the rest of your hair. The good news is, you don’t need to do a full wash and style every morning. A few simple tricks can keep your bangs looking fresh, bouncy, and perfectly parted.
Maintaining your bangs is all about having the right techniques in your back pocket. Whether you’re dealing with second-day grease, stubborn cowlicks, or just want a break from styling, there are easy ways to manage them. Think of it less as a chore and more as a quick refresh that makes a huge impact on your overall look. From a spritz of dry shampoo to a strategic pin, these tips will help you love your curtain bangs every single day, not just on hair-wash day.
Refresh with Dry Shampoo
Bangs have a knack for getting greasy before any other part of your hair, mostly because they’re in constant contact with your face and hands. This is where dry shampoo becomes your absolute best friend. A quick spray can absorb excess oil, get rid of any stringiness, and add a little bit of volume and texture back into your bangs. It’s the perfect solution for extending your style on days you don’t wash your hair.
To use it effectively, lift your bangs and spray the roots lightly. Let it sit for a minute to work its magic, then use your fingertips to massage it in. You can also use a comb to brush out any excess product. This simple step will make your bangs look and feel clean, giving them the lift they need to frame your face beautifully.
Reset with a Water Spritz
Have you ever woken up with your bangs pointing in every direction except the one you want? Instead of fighting them with heat tools, give them a quick reset with water. A few spritzes from a spray bottle are often all it takes to make them cooperative again. This is especially helpful for wavy or curly hair types, as it can help reactivate your natural texture without causing frizz.
Simply dampen your bangs at the root, then use a comb to guide them back into place. You can let them air-dry or give them a quick blast with a blow-dryer and a round brush to reshape them. This technique gives you a fresh start in under five minutes, saving you from having to wash your entire head.
Pin Them Back for a Different Look
Some days, you just don’t want to deal with hair in your face, and that’s perfectly okay. Having curtain bangs doesn’t mean you’re stuck with one style. Pinning them back is a chic and practical way to switch things up. It’s also a great fallback if you’re in between trims and they’re starting to get a little long. Use a couple of bobby pins that match your hair color for a subtle look, or make a statement with a stylish clip or barrette.
This is also your best strategy if an at-home trim doesn't go as planned. Instead of trying to "fix" bangs that are too short or uneven, it's better to pin them back and let them grow. This gives you a graceful way to wait for your next professional appointment.
How Often Should You Trim Them?
Curtain bangs are fairly low-maintenance compared to their blunt counterparts, but they still need regular trims to keep their signature shape. To prevent them from getting into your eyes and losing their soft, sweeping effect, you’ll want to plan for a trim every four to six weeks. This timeline keeps them at the perfect length to flatter your cheekbones and frame your eyes.
Of course, everyone’s hair grows at a different rate, so pay attention to your own. Once you notice they’re feeling heavy or aren’t styling as easily, it’s probably time for a touch-up. You can always pop into one of our MjjM Salons locations for a quick and professional bang trim to keep them looking flawless.
When Is It Time to See a Professional Stylist?
While a little trim at home can keep your curtain bangs looking sharp, there are definitely times when it’s best to put down the scissors and head to the salon. Think of at-home trims as maintenance, not major surgery. The initial cut, for example, should always be left to a professional. A great stylist will create the perfect shape for your face and hair texture, giving you a flawless foundation to work with.
So, what happens if a trim goes wrong? Maybe one side is shorter than the other, or you’ve gone a bit too short for your liking. The first rule is to stop cutting. Trying to fix a mistake yourself often makes it worse. This is the perfect moment to call for backup. A professional stylist can work magic on a cut that’s gone astray, blending away mistakes and restoring balance to your bangs. They’ve seen it all and can help you get back on track without sacrificing more length than necessary.
It’s also time to see a pro if you’re feeling nervous or if the upkeep is becoming a hassle. If the thought of snipping near your face fills you with dread, it’s simply not worth the stress. A salon visit is a treat, not a test. Similarly, if you find that your bangs require more daily styling than you signed up for, a stylist can offer advice. They might suggest a slight change to the cut to make it more manageable for your lifestyle or show you a styling trick you hadn't considered. Your hair should work for you, not the other way around.
Frequently Asked Questions
I messed up and cut my bangs too short. What should I do? First, take a deep breath and step away from the scissors. The most important rule when you’ve made a mistake is to stop cutting, as trying to “fix” it often makes things worse. Your best bet is to embrace styling for a few weeks. Use cute bobby pins or a stylish barrette to pin them back or to the side. A headband can also be a great accessory. It’s a temporary situation, and your hair will grow back faster than you think.
Can I trim my curtain bangs if my hair is curly or wavy? Absolutely, but the process is a little different. It is even more important for you to cut your hair when it is completely dry and styled as you normally wear it. Instead of pulling the hair straight, which would disrupt your curl pattern, it’s better to trim the ends of each curl or wave individually. This ensures they fall naturally and you don’t accidentally cut them too short due to shrinkage.
How do I know what length is right for my face? A great starting point for most people is a length that hits right at the cheekbones, as this tends to flatter and soften almost any face shape. If you want a more noticeable bang, aim for the tip of your nose. The best part about curtain bangs is their versatility, so you can adjust the length based on what features you want to highlight. Just remember the golden rule: always make your first cut a little longer than you think you want.
Do I really need to buy special scissors for a small trim? Yes, you really do. Using kitchen or craft scissors can cause more harm than good because they aren't sharp enough to make a clean cut. Instead, they can bend and fray the hair shaft, which leads to split ends and a less polished look. Investing in a pair of proper hair-cutting shears is a small price to pay to protect the health of your hair and get a much better result.
My bangs always look greasy by the end of the day. How can I stop this? This is a super common issue, since your bangs are in constant contact with your forehead and hands. Your best friend here is dry shampoo. A quick spritz at the roots will absorb any oil and add a bit of volume. If you don't have any on hand, you can also do a quick "sink wash" by just washing your bangs over the sink without having to wash all of your hair.